
Bike Commuting: Outfitting Your Bike
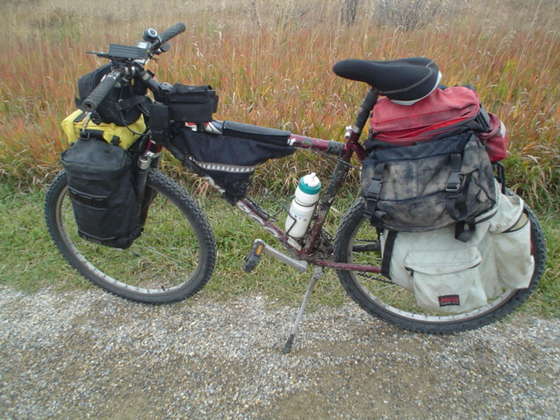 You’ve got your bike and you’ve planned your route, but before you head out you want to make sure you’re ready for everything the road can throw at you. At the advent of summer, Trek started a “Go By Bike” campaign that included a handy little diagram of things you needed for your bike. Good idea, but dumb campaign because they included things you should have that are painfully obvious (such as a seat) but neglected things like a rack or wedge pack. You probably don’t need to go as crazy as the guy in the photo but you should have the stuff you need to get you to and from your destination safely and with confidence.
A Handy Dandy Check List of Must-Haves
- A helmet: I think Roland covers this one pretty well.
- A Mirror: Whether you rock the handlebar or helmet kind, get a mirror and use it well. it’s key for knowing where cars are and riding safely. If you’re really into tech, this is pretty dope.
- Wedge-pack: Ok, this doesn’t sound like a must have, but trust me, it’s key. This is a little pack that you fit under your saddle (bike speak for seat) and use to store tire levers, a spare tube or patch kit, and a multi-tool. With this simple pack you can take on anything. And for those thinking “I don’t really need that stuff”, getting a flat with no way to repair it can really put a damper on your day. Working for Equality Maine, we exceeded our expectations, getting triple the number of signatures we expected but my most poignant memory is getting in a fight with a curb and walking home.
- Frame-pump: That spare tube isn’t going to help if you can’t put air in it.
- Lights: Front and rear.
A List of Helpful Items
- Fenders: BikeSnobNYC puts it better than I possibly can. Also, it’s way easier to change for work when you don’t have to scrub tons of mud off your legs.(Or is that just me?)
- A pack: Messenger bag or backpack, these are low maintenance ways of transporting your stuff around. You can even hack your messenger bag.
- A rack: After commuting with just a backpack for a year, I finally upgraded and am now rocking a sweet new rear rack. Using shock corda, I strap an old pack down and don’t have to worry about carrying a pack on my back which can be sweaty business.
- Panniers: If shock cords and a backpack aren’t cutting it, Instructables will help you out. You could also buy panniers, but where’s the fun in that.
- Cage: Hydration is good. And of course, a water bottle to go in the cage.
A List of Wearable Items
- Jacket: If you’re going to be an all-weather commuter, a jacket is key. Some days there’s nothing more invigorating than the primal energy of riding all out in a rain storm, but other days it’s just lousy and cold. Be prepared for either. My jacket (except when it’s drying out) lives in the bottom of my pack.
- Safety glasses or sunglasses: I habitually rock my safety goggles when I ride to and from work. Mine are the free safety goggles I saved when my former boss upgraded his stock of safety goggles but sunglasses work well too. My theory on rocking dorky free glasses is the fact that I’m going so fast I’m worried about hitting bugs makes me awesome and on days that’s not good enough, no one looks cool while biking five miles with a gnat in their eyelash.
- Bike Gloves: Not necessary, but the extra padding on the palm of the glove makes the ride far more comfortable.
- Bike Shorts: Ditto the not necessary but comfortable. If bike shorts are too geeky for you, check out these hacked knickers. Basically, shorts with extra padding make for a smoother ride and shorts and knickers keep your pants from getting caught in your gears/derailer/cage.
That’s it! That wasn’t so hard, was it? As a final step, spraying down all your gear with a water repellant (I used Camp Dry) will keep your work clothes dry on a rainy day, because there’s nothing worse than having to sit at work for hours in soaking wet clothes.
You’re now reading to face everything Mother Nature can throw at you. Stayed tuned for tips on staying safe on the road. If I’m missing anything, feel free to post below.
Photo Credit: Instructables

Leave a Reply